Barbara attended the Free Motion Quilting class in June. Having learned a trick or two, she went home and finished her first free motion quilted quilt, with stippling throughout and hearts on each of the Squares. It's a Disney Princess Quilt! Click on the photo for a better view. I love seeing what my students are doing with their newfound skills. Thank you Barbara for sharing your work and allowing me to post it.
Sunday, July 10, 2016
Free Motion Success Story
Barbara attended the Free Motion Quilting class in June. Having learned a trick or two, she went home and finished her first free motion quilted quilt, with stippling throughout and hearts on each of the Squares. It's a Disney Princess Quilt! Click on the photo for a better view. I love seeing what my students are doing with their newfound skills. Thank you Barbara for sharing your work and allowing me to post it.
Monday, June 20, 2016
What I'm Stitching
While I wish I had a picture of this piece before I started thread painting, I thought I'd share the work in progress now, and post another picture when it is completed. I'm still thinking about a name--Anderson Island Mermaid? Dawn over Oro Bay? Nisqually Reach?
I acquired this beautiful batik while visiting friends on Anderson Island in Washington state. They had a large box of fabrics from a man whose quilting wife had passed away and generously suggested I take what I liked. Who can refuse an offer like that! In the collection was this batik piece, about 30"x 35", of a mermaid silhouetted against the sunrise (or moon? or sunset?) Regardless, it was too lovely to leave in a box of unclaimed fabric!
I admired her for some time, thinking about how to enhance the batik. I started thread-painting her hair, ultimately adding eight colors of thread over the dark batik base. My threads ranged from a variegated golden brown to dark purple. It was so much fun to thread paint such a large area! I then added scales to her tail, using turquoise, green, purple and yellow thread. The shelf she sits on was a solid dark blue, the same color as her hair and tail. I used my bag of 'tree bits' to add a wash of colors, with variegated thread holding the tiny bits of fabric trapped beneath a layer of tulle. I layered the main elements over a scrap of polyester batting for loft, then sandwiched the whole with batting and backing. Next step is to quilt the background--the sun (or moon) sky and water, and decide how to finish the piece for hanging. I am still debating further embellishments in the form of glitter, sequins or beads.
Got a suggestion for a name or further embellishment? Let me know! Here is a glimpse:
I acquired this beautiful batik while visiting friends on Anderson Island in Washington state. They had a large box of fabrics from a man whose quilting wife had passed away and generously suggested I take what I liked. Who can refuse an offer like that! In the collection was this batik piece, about 30"x 35", of a mermaid silhouetted against the sunrise (or moon? or sunset?) Regardless, it was too lovely to leave in a box of unclaimed fabric!
I admired her for some time, thinking about how to enhance the batik. I started thread-painting her hair, ultimately adding eight colors of thread over the dark batik base. My threads ranged from a variegated golden brown to dark purple. It was so much fun to thread paint such a large area! I then added scales to her tail, using turquoise, green, purple and yellow thread. The shelf she sits on was a solid dark blue, the same color as her hair and tail. I used my bag of 'tree bits' to add a wash of colors, with variegated thread holding the tiny bits of fabric trapped beneath a layer of tulle. I layered the main elements over a scrap of polyester batting for loft, then sandwiched the whole with batting and backing. Next step is to quilt the background--the sun (or moon) sky and water, and decide how to finish the piece for hanging. I am still debating further embellishments in the form of glitter, sequins or beads.
Got a suggestion for a name or further embellishment? Let me know! Here is a glimpse:
| Mermaid in progress--Rana O'Connor 2016 |
Wednesday, April 20, 2016
A Mess of Thread
I thought it would be fun to describe how I came to quilt (and quilt) my latest quilt. Don't you find it confusing that quilt is both a noun and a verb? I started with a very simple pattern in one of my older books. The pattern is a traditional Boston Common with some four-patch blocks in alternate rows. I chose it because I had a stack of mostly sunflower fabrics to use and the required amounts meshed well with what I had. It's also a pattern I love, so I knew I would enjoy piecing it.
I started off stitching in the ditch along several major seam lines to provide stability. I'm not convinced when everything has been spray basted that this is a necessary step, but it gave me a chance to move the quilt around under my machine, assessing what might work for free motion patterns. I knew I wanted some curvy quilting to offset the straight lines of the design, and I wanted some of that quilting to be feathers.
| Quilted |
For the outside border I chose piano keys for their straight lines, balancing the curved quilting everywhere else. The green thread worked well here. I used blue painter's tape along the block points to mark the keys and guide my stitching, which I carried into the green border, stopping each line where it touched the leaves. For these straight lines I switched back to a regular foot, not free motion. This provided greater control but also meant I had to stop and start over for each line. I think long-arm quilters use a ruler for this work. I hear a ruler foot is available for a domestic machine now--maybe that will be my next toy?
| Red Thread! |
| Vines, feather, piano keys and fill |
All that's left is to bind and label. I'm seriously thinking of naming it A Mess of Thread--all that quilting and over quilting and issues with tension as I learned to work with my new feet! For the record, I really like them. Much better than my old clear plastic foot that wasn't so clear any more and was hard to see through and hard to see around. The metal feet are so much smaller they don't obscure my vision at all. If you've stuck with me this long, you are truly a quilting geek! Go quilt!
![]() |
| The back |
Thursday, April 7, 2016
Picture This!
So proud of the students in the Picture This! class last weekend. In spite of challenges with the fusible web on Friday, they persevered and produced the truly marvelous parade of chairs seen above!
The second day we worked on creating a landscape for the chairs and boats to live in. Everyone learned several new techniques, including the most fun way to make trees from Tree Bits! I didn't get a chance to snap a photo of anyone's tree, so take my word for it, they look amazing.
It is really cool to see how the fabric choices affect the mood of the scene. Even before any stitching is done, the pieces begin taking on perspective and dimension. I sure hope some of the students will send along pictures of their finished pieces (or works in progress!) Here are some photos taken around mid-day.
| Lisa's scene with curly grass and swirly water |
| Sandrea played pattern on pattern to great effect |
| Pat's luscious fabric choice for her ground really wowed us
Missed the fun? Linda and I will be teaching Baker's Dozen Improv on Saturday, May 14. Sign up with Tyler at the Sewing Machine Exchange. It will be a blast!
|
Tuesday, March 29, 2016
Floral Nine Patch
Thursday, February 11, 2016
Baker's Dozen
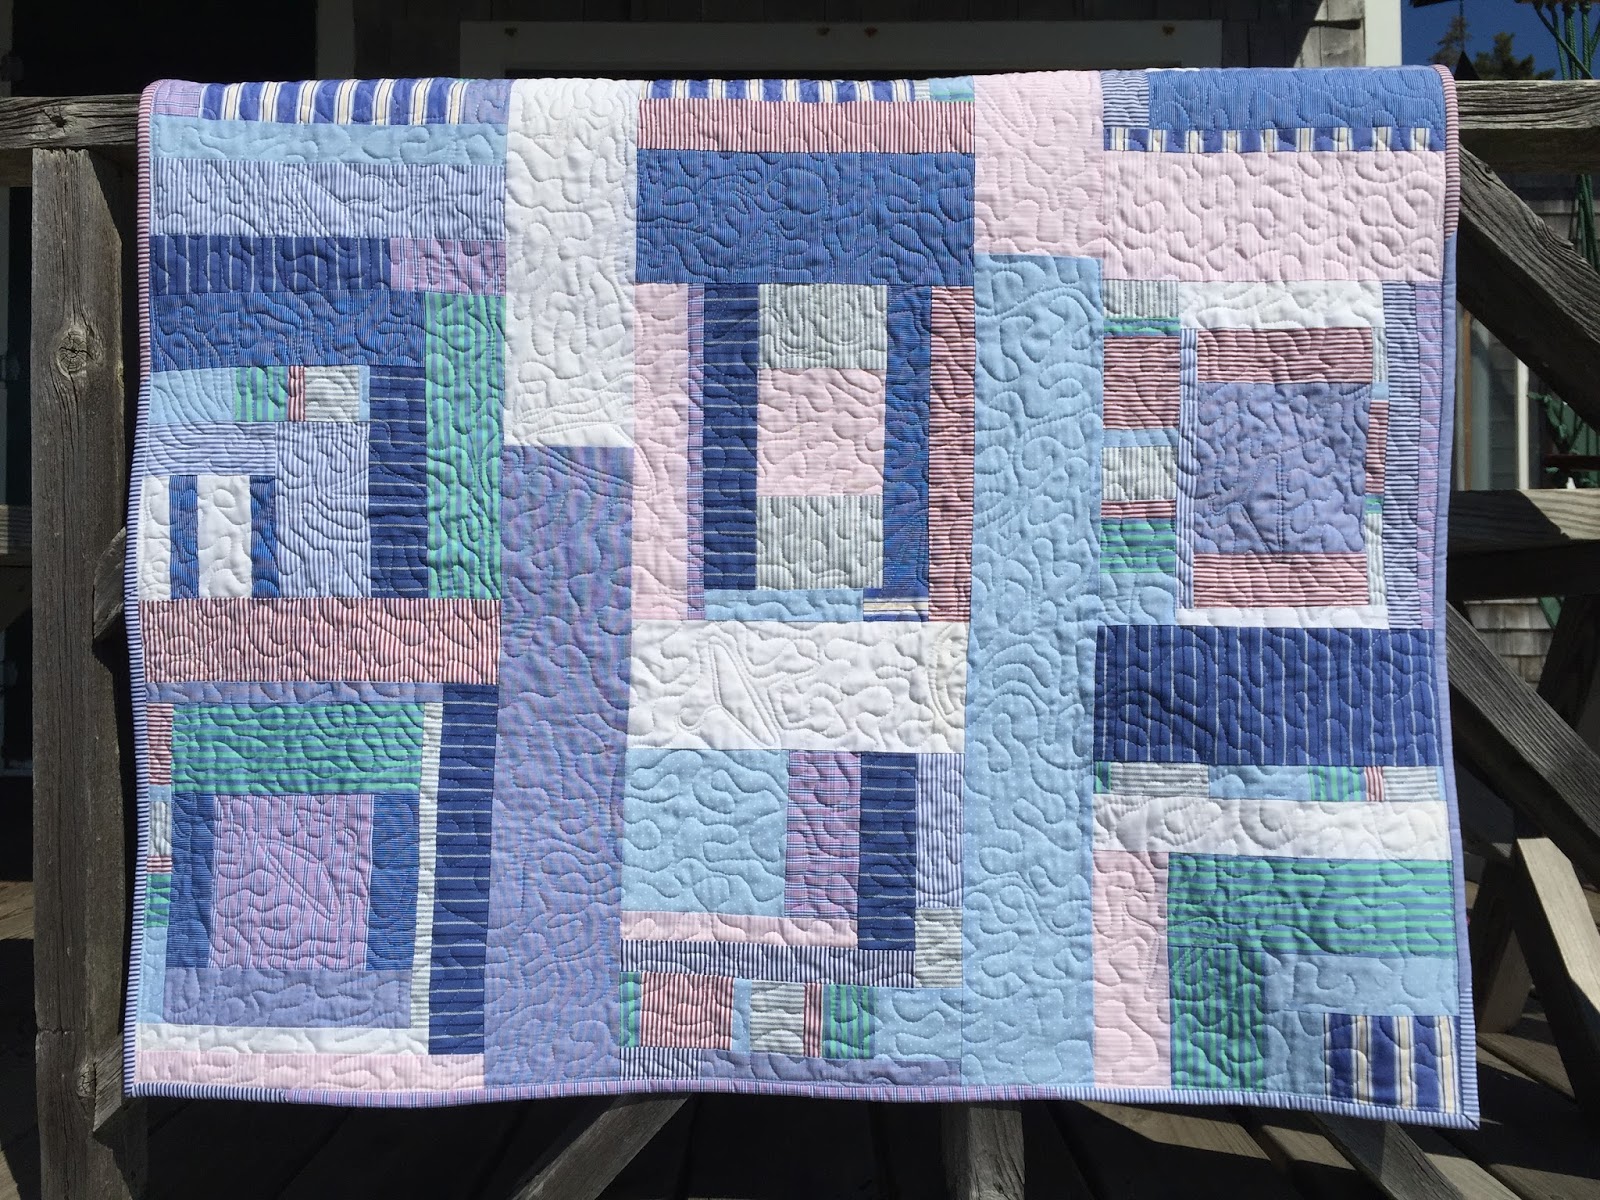
Just finished quilting a small quilt top I made last summer. Time can get away from me! In a departure from my usually more scripted work, this top was pieced improvisationally from strips and squares. I don't have solids in my stash, but I had a bag of solid scraps (and added one fabric to make 13 colors, but used the back side to hide the print!) With a few parameters in place, the blocks came together quickly and went up on the design wall. Pieced sashing helped blur the block edges and brought the composition together.
I enjoyed the improv piecing so much I started on another one right away! I made the second one from shirting fabrics and quilted it in Friendship last summer, in an all-over clothes hanger pattern. A friend snapped it up, but here's a photo.
Recently I pulled out the solid pieced top and decided it was time to quilt it. In keeping with the improvisational spirit, I chose to let the quilting develop organically as well. The first decision I made was to overlay the quilting, rather than follow any of the lines in the quilt, but I wanted something more than an all-over pattern. I grabbed a dinner plate and a salad plate and a piece of chalk and drew large, concentric circles. Stitched those. Filled the space between the circles with smaller circles and curlicues. Added straight lines, like ladders. Decision by decision, the quilting filled the top.
Now that it's done, I want to share the fun of making these quick, no stress pieces. My friend Linda and I will be teaching a beginner friendly class, Baker's Dozen Improvisational Piecing on May 14 at the new class space at The Sewing Machine Exchange in Falmouth, Come if you can!
I enjoyed the improv piecing so much I started on another one right away! I made the second one from shirting fabrics and quilted it in Friendship last summer, in an all-over clothes hanger pattern. A friend snapped it up, but here's a photo.
Recently I pulled out the solid pieced top and decided it was time to quilt it. In keeping with the improvisational spirit, I chose to let the quilting develop organically as well. The first decision I made was to overlay the quilting, rather than follow any of the lines in the quilt, but I wanted something more than an all-over pattern. I grabbed a dinner plate and a salad plate and a piece of chalk and drew large, concentric circles. Stitched those. Filled the space between the circles with smaller circles and curlicues. Added straight lines, like ladders. Decision by decision, the quilting filled the top.
Now that it's done, I want to share the fun of making these quick, no stress pieces. My friend Linda and I will be teaching a beginner friendly class, Baker's Dozen Improvisational Piecing on May 14 at the new class space at The Sewing Machine Exchange in Falmouth, Come if you can!
Saturday, November 14, 2015
Hope Blooms
![]() |
| Hope Blooms 2015 Rana O'Connor |
Jo recently retired. I hoped to recover a banner we once created for a fundraiser with the statement, "Hope Blooms in Foster Care." The banner was long gone, though, so I set about to make Jo her very own memento.
Pulling scraps of fabric for the petals, I found a green swirled fabric in my stash for the flower center and applique letters. The girl with balloons came from fabric we used in a more recent banner. The muslin background seemed plain, but a set of alphabet stamps came to the rescue, and I stamped h-o-p-e randomly across the field. Thread paint for the petals and quilting in the flower center and background complete this roughly 15" square wall hanging.
After years of tireless advocacy on the part of Maine's children and foster/adoptive families, I wish Jo many years of happiness ahead. Cheers!
Subscribe to:
Posts (Atom)