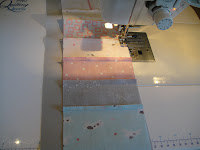
When we left off, you had 3 columns of stacked coins completed. Time to create the sashing. Cut strips from your background fabric. Cut 2 strips 5” by width of
fabric (42”) and 2 strips 6 ½” by width of fabric. Lay out the quilt top: Wide sashing strip, stacked coin column, narrow
sashing strip, stacked coins, narrow sashing, stacked coins, wide sashing. See completed quilt, below, for layout.

Trim selvages from backing fabric. Piece if desired. Leftover charms
make a nice row to piece into the back. Press back flat. Layer backing, batting and quilt top, baste with spray or pins. Your quilt is ready for quilting!

 Once the quilting is done, it’s time to bind the quilt. Cut your binding fabric into strips 2 ¼” wide
by width of fabric. Piece the strips together, to make
one continuous length at least 15” longer than the quilt’s perimeter.
This quilt needs about 170” of binding. Fold in half lengthwise with wrong
sides together, pressing as you go, to make a strip that is 1 ⅛” wide. Stitch
to quilt, matching raw edges and mitering corners. Finish tails with a diagonal seam.
Trim backing and batting ½” away from the seam. This will give you
the ¼” seam plus about ¼” of backing/batting to fill the binding. Press binding
away from quilt. Turn folded edge to quilt back and stitch by hand. Try not to
let stitches show on the front.
Make a label with your name, date, location and any other information
you would like. Labels can be plain or fancy, using a fabric marker,
embroidered, printed on prepared fabric, painted, or stamped. Sew securely to back of quilt. Show off your new quilt!


Quilt gallery and quilts for sale at: Rana's Quilt Photos
No comments:
Post a Comment