Showing posts with label free motion quilting. Show all posts

Monday, May 28, 2018

Lisa's Mug Rug


Lisa took my free motion quilting class at The Sewing Machine Exchange earlier this month. I love seeing student projects--and this one is terrific--love the design and the fabric with the bird is so great. Look it up! A small project like this is a perfect opportunity to practice new skills. Go quilt!


Monday, February 13, 2017

Try Something New!

I downloaded a video by Esterita Austin called "Dynamic Fabric Art Portraits." I've linked to a short video preview. The technique was intriguing and I wanted to give it a try . . . sometime. Lucky for me, Art Quilts Maine members Jane and Pam issued a challenge in October to create a 12" x 14" portrait. Finished pieces were to be revealed in February. What a perfect opportunity to experiment with Esterita Austin's technique! Her portraits begin with a piece of hand dyed fabric.
Fabric used for Face
By means of judicious cutting, the entire face is constructed from that single piece of fabric. I was amazed at the way the features came together! Part two of her technique involves using tiny amounts of light and dark paint to add a few highlights and shadows. A thin line defines the eyes, a little white paint highlights the bridge of the nose, but there is minimal manipulation other than choosing how and where to cut the fabric. Speaking of which, my fabric looked rather ratty after I cut it all apart--you must be willing to sacrifice your piece of fabric to the portrait! Having created the face from one piece of fabric, I decided to use only one other piece to finish. I found this great, colorful elephant print in my stash and began cutting it apart into separate elements.

Fabric used for Frame
Jane gave us each a piece of red fabric to incorporate in our portraits, which I did though I defy you to find it! There are 6 or 8 pieces of the dark red fabric tucked in with the elephants and plants surrounding the face. This was really fun to do and I learned several tricks to use in future portraits, my current obsession! Here's my finished piece--still working on a name--any ideas?

Portrait 2017

Sunday, August 14, 2016

Lady of Oro Bay

Sketching
I'm liking Oro Bay as the location. Oro means gold in Spanish and finding this batik was like finding treasure. (See my earlier post here) Many sketches later, I finally committed to quilting the moon this weekend.

Clouds scuttle across the sky in white rayon thread, while the moon is filled in with bubbles and straight lines done in a pale green silk. This has been a fun piece to work on! Soon as I figure out how to quilt the sky, the quiltingt will be done and I can move on to embellishments--and I do plan to embellish! I realized that I have no plan for how to finish the piece--some sections of the print go right up to the edge of the fabric and may pose a problem. I'll tackle that later. For now, I'm really happy with the weekend's work. Here's a shot:

Stitching

Sunday, July 10, 2016

Free Motion Success Story


Barbara attended the Free Motion Quilting class in June. Having learned a trick or two, she went home and finished her first free motion quilted quilt, with stippling throughout and hearts on each of the Squares. It's a Disney Princess Quilt! Click on the photo for a better view. I love seeing what my students are doing with their newfound skills. Thank you Barbara for sharing your work and allowing me to post it. 

Monday, June 20, 2016

What I'm Stitching

While I wish I had a picture of this piece before I started thread painting, I thought I'd share the work in progress now, and post another picture when it is completed. I'm still thinking about a name--Anderson Island Mermaid? Dawn over Oro Bay? Nisqually Reach?

I acquired this beautiful batik while visiting friends on Anderson Island in Washington state. They had a large box of fabrics from a man whose quilting wife had passed away and generously suggested I take what I liked. Who can refuse an offer like that! In the collection was this batik piece, about 30"x 35", of a mermaid silhouetted against the sunrise (or moon? or sunset?) Regardless, it was too lovely to leave in a box of unclaimed fabric!

I admired her for some time, thinking about how to enhance the batik. I started thread-painting her hair, ultimately adding eight colors of thread over the dark batik base. My threads ranged from a variegated golden brown to dark purple. It was so much fun to thread paint such a large area! I then added scales to her tail, using turquoise, green, purple and yellow thread. The shelf she sits on was a solid dark blue, the same color as her hair and tail. I used my bag of 'tree bits' to add a wash of colors, with variegated thread holding the tiny bits of fabric trapped beneath a layer of tulle. I layered the main elements over a scrap of polyester batting for loft, then sandwiched the whole with batting and backing. Next step is to quilt the background--the sun (or moon) sky and water, and decide how to finish the piece for hanging. I am still debating further embellishments in the form of glitter, sequins or beads.

Got a suggestion for a name or further embellishment? Let me know!  Here is a glimpse:
Mermaid in progress--Rana O'Connor 2016

Wednesday, April 20, 2016

A Mess of Thread

This is a pretty wonky post so if you aren't into the minutiae of quilting, you may want to just scroll through the pictures.

I thought it would be fun to describe how I came to quilt (and quilt) my latest quilt. Don't you find it confusing that quilt is both a noun and a verb? I started with a very simple pattern in one of my older books. The pattern is a traditional Boston Common with some four-patch blocks in alternate rows. I chose it because I had a stack of mostly sunflower fabrics to use and the required amounts meshed well with what I had. It's also a pattern I love, so I knew I would enjoy piecing it.

I chain pieced the blocks, finishing the top over a couple of weekends. Then came quilting decisions. One reason I put this simple top together was to practice quilting with my new toy, a free motion quilting foot set. It is pretty cool. Three different feet on a base that attaches to my machine. Open toe, closed toe and for lack of a better term, big toe.

I started off stitching in the ditch along several major seam lines to provide stability. I'm not convinced when everything has been spray basted that this is a necessary step, but it gave me a chance to move the quilt around under my machine, assessing what might work for free motion patterns. I knew I wanted some curvy quilting to offset the straight lines of the design, and I wanted some of that quilting to be feathers.

Quilted
Starting in the light center portion, I quilted feathers out from the center to the yellow corners. I liked the effect but had chosen a variegated yellow thread and it just didn't show up as much as I wanted it to. I let that thought percolate for a while as I quilted a leaf and vine pattern in the green squares, treating them as a border. Originally I had selected a green thread for this, but opted to keep my machine threaded with yellow, increasing visibility on the green background. Better, though still not a strong enough statement. A friend suggested I go around a second time, outlining the leaf and vine pattern. That second row of yellow quilting really helped.

For the outside border I chose piano keys for their straight lines, balancing the curved quilting everywhere else. The green thread worked well here. I used blue painter's tape along the block points to mark the keys and guide my stitching, which I carried into the green border, stopping each line where it touched the leaves. For these straight lines I switched back to a regular foot, not free motion. This provided greater control but also meant I had to stop and start over for each line. I think long-arm quilters use a ruler for this work. I hear a ruler foot is available for a domestic machine now--maybe that will be my next toy?

Red Thread!
Next came filler quilting. To make motifs pop you need to flatten the background. To accomplish this I first echo quilted my feathers twice using yellow thread, then switched to Bottom Line thread in off-white so it would not compete with my feathers and stippled the open areas. I loved how the feathers began to fill and stand away from the background but that yellow thread still blended into the background to the point of disappearing! In desperation I grabbed a spool of heavy, dark red thread and quilted over one of the feathers, figuring I could rip it out if I wasn't pleased. Not bad! I took a deep breath and over-quilted all the feathers with dark red, leaving the yellow beneath and as echo quilting. Much happier. Who would have thought?

Vines, feather, piano keys and fill
Remember the green thread? I decided to use it as filler thread around the vine, as the color blended with the background better than my Bottom Line off-white. Being thicker than Bottom Line, the green also provided a nice texture change. I filled all the spaces between the leaves on the side of the quilt next to the center, but on the side with the piano keys I opted to add filler only to a few larger spaces, between the keys. I love the effect!

All that's left is to bind and label. I'm seriously thinking of naming it A Mess of Thread--all that quilting and over quilting and issues with tension as I learned to work with my new feet! For the record, I really like them. Much better than my old clear plastic foot that wasn't so clear any more and was hard to see through and hard to see around. The metal feet are so much smaller they don't obscure my vision at all. If you've stuck with me this long, you are truly a quilting geek! Go quilt!

The back

Tuesday, March 29, 2016

Floral Nine Patch

Sometimes it's fun to do something quick and easy. I can enjoy the colors and patterns without over thinking it. Having just finished my piece for this year's challenge (which is not revealed until June) I wanted just such a breather. I had several florals kicking around--mostly sunflowers in various sizes. I did not want to buy fabric for this piece, so I found a design that accommodated the fabrics I had on hand (although I did have to mix in a few bits--but that always adds interest, no?) I might have improv pieced, but I've always liked this pattern, with its simplicity showcasing the fabrics, and it seemed serendipitous that what I had could be made to fit the pattern requirements.The large red print has chickens in it--a piece of red fabric with small black chickens was the perfect tie-in. It is coming together quickly, though I've not thought about how to quilt it. I'm sure inspiration will strike by the time I finish stitching the top--perhaps you have an idea? 


Thursday, February 11, 2016

Baker's Dozen

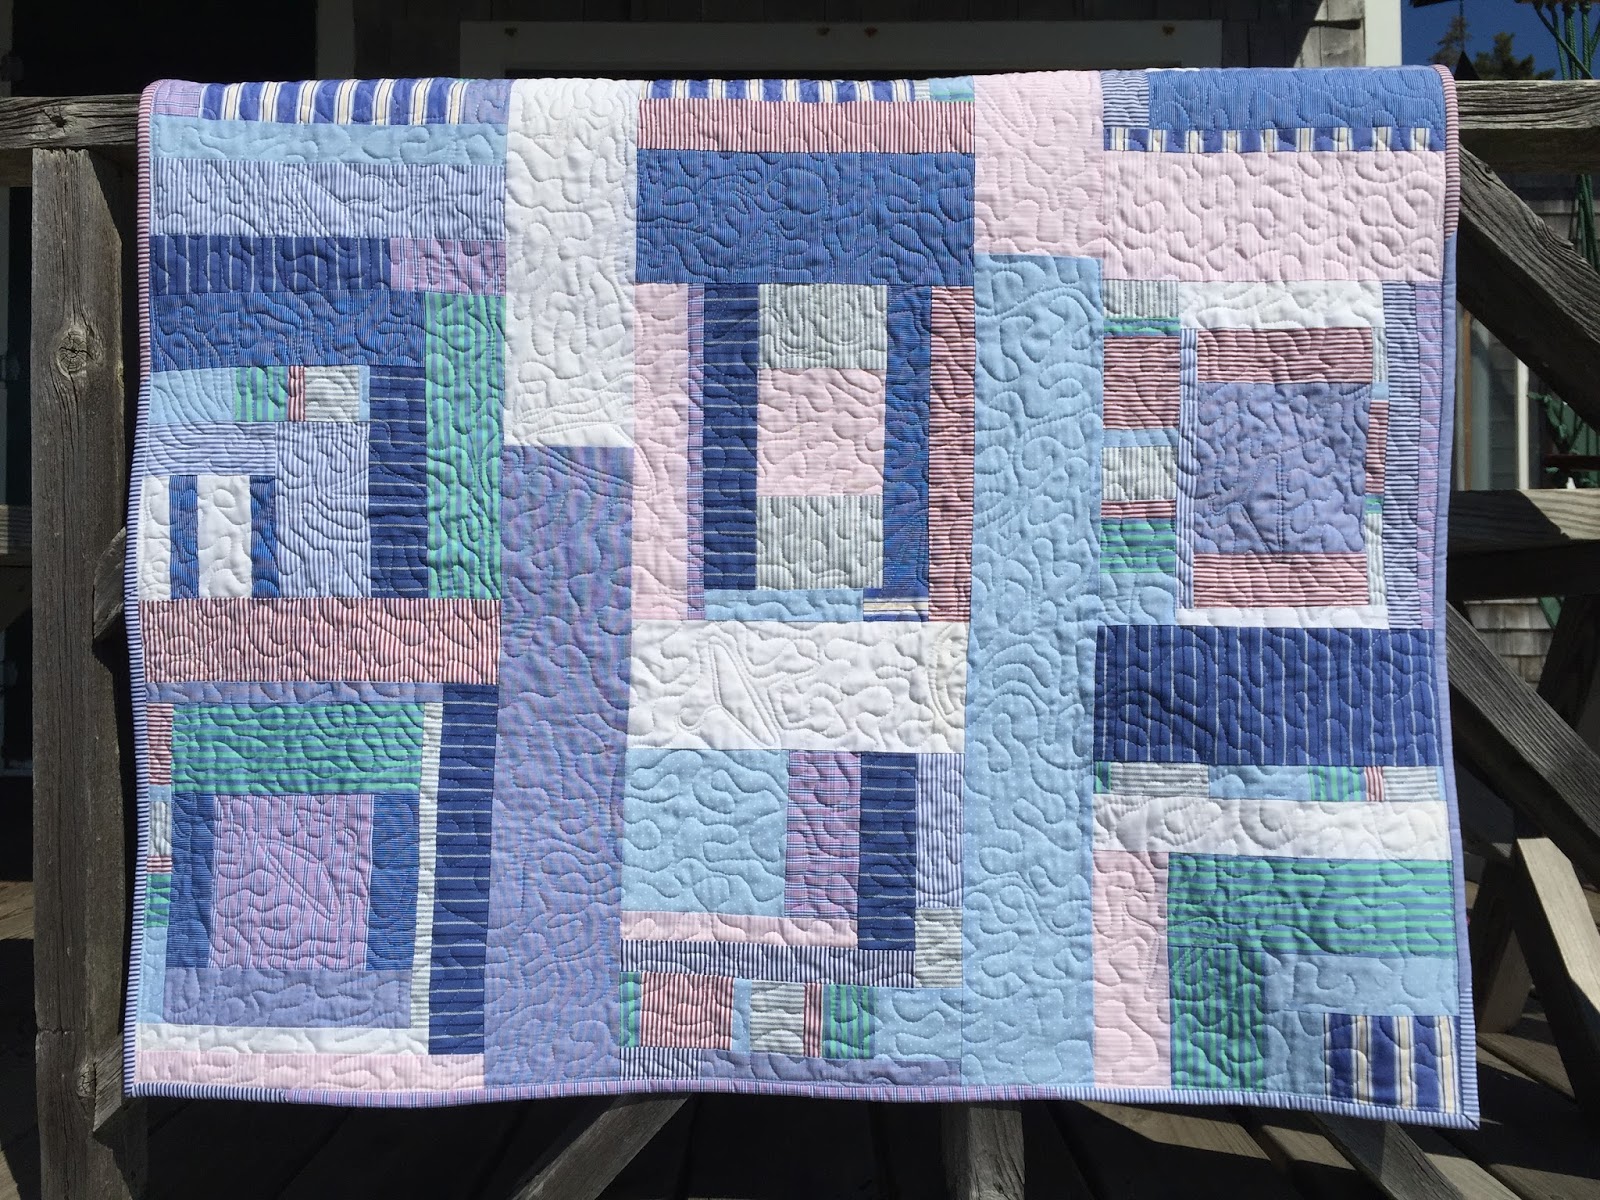
Just finished quilting a small quilt top I made last summer. Time can get away from me! In a departure from my usually more scripted work, this top was pieced improvisationally from strips and squares. I don't have solids in my stash, but I had a bag of solid scraps (and added one fabric to make 13 colors, but used the back side to hide the print!) With a few parameters in place, the blocks came together quickly and went up on the design wall. Pieced sashing helped blur the block edges and brought the composition together.

I enjoyed the improv piecing so much I started on another one right away! I made the second one from shirting fabrics and quilted it in Friendship last summer, in an all-over clothes hanger pattern. A friend snapped it up, but here's a photo.

Recently I pulled out the solid pieced top and decided it was time to quilt it. In keeping with the improvisational spirit, I  chose to let the quilting develop organically as well. The first decision I made was to overlay the quilting, rather than follow any of the lines in the quilt, but I wanted something more than an all-over pattern. I grabbed a dinner plate and a salad plate and a piece of chalk and drew large, concentric circles. Stitched those. Filled the space between the circles with smaller circles and curlicues. Added straight lines, like ladders. Decision by decision, the quilting filled the top.

Now that it's done, I want to share the fun of making these quick, no stress pieces. My friend Linda and I will be teaching a beginner friendly class, Baker's Dozen Improvisational Piecing on May 14 at the new class space at The Sewing Machine Exchange in Falmouth, Come if you can!

Saturday, November 14, 2015

Hope Blooms

Hope Blooms 2015 Rana O'Connor
A small tribute to a long time colleague in the world of foster/adoptive care. We worked together for many years on a collaborative team designed to raise awareness of the need for foster/adoptive parents and to support families who work with Maine's treatment foster care agencies and the Office of Child and Family Services.

Jo recently retired. I hoped to recover a banner we once created for a fundraiser with the statement, "Hope Blooms in Foster Care." The banner was long gone, though, so I set about to make Jo her very own memento.

Pulling scraps of fabric for the petals, I found a green swirled fabric in my stash for the flower center and applique letters. The girl with balloons came from fabric we used in a more recent banner. The muslin background seemed plain, but a set of alphabet stamps came to the rescue, and I stamped h-o-p-e randomly across the field. Thread paint for the petals and quilting in the flower center and background complete this roughly 15" square wall hanging.

After years of tireless advocacy on the part of Maine's children and foster/adoptive families, I wish Jo many years of happiness ahead. Cheers!

Sunday, October 25, 2015

Wedding Quilt Part 2

This weekend is all about making progress on the wedding quilt, commissioned by a friend for her son's wedding. Having pieced the top, incorporating fabrics from the duffel bag full of fabric she gathered in his grandmother's storeroom and sections cut from the woodblock printed bedspread, it is time to stop procrastinating and get on with the quilting.

An encounter this summer with a woman who quilted large pieces on her home sewing machine gave me pointers on how to wrangle this quilt. I layered the center two-thirds with batting and backing, leaving two wide side sections aside. Less fabric has made maneuvering the quilt under my machine manageable. The center section is nearly complete. By the end of the weekend I hope to have figured out how to attach the sides, if not quilt them.


I am always impressed by how quilting elevates and completes a piece, adding nuance and definition, taking the piece from flat to dimensional. It is an issue I have with some quilt shows, that award prizes to the person who created the top, regardless of whether they quilted the piece or had it quilted by someone else. The person doing the quilting may be mentioned, but is often not included in the award. There are pieces that are entered as the collaborative work of two people. I believe if the quilt is stitched by more than one person, all parties should be equally recognized. Compare the photos in this post to those of the quilt taking shape but not yet quilted, here. 


Friday, October 16, 2015

Fall in Maine

I have been absent, not posting for a while. I wish I could say I was busy finishing quilts, but not so. Although I did deliver over 35 quilts to Kimball St Studios in Lewiston for Art Quilts Maine's second annual show! It is beautifully hung and it is not too late to view it. We have just decided to keep the quilts on display until October 29, so if you are in the area, stop by. Click the link for information on the gallery. Included in the show is this year's Travelling Challenge Quilt Show, the theme of which is fabric manipulation. The Travelling Challenge will be at Portland Public Library next, during December and January. Some truly creative pieces in that group!
We also traveled to Florida and Honu found a home, hanging on a wall at Jerry's Mom and PaPa Joe's home. It really is the perfect spot for this wall hanging, since we went with them to Hawaii, on the trip that inspired Honu.
I teach a full class tomorrow at Sew Portland on Free Motion Quilting. If you didn't get into this session, I'll be scheduling another one--maybe after the holidays. Meanwhile, work is progressing on the wedding quilt commission and a new round robin series.

I recently made up a new batch of Quiltini Pins and will be looking for opportunities to put them out for sale. Once I get started they are addicting to make--each a tiny, embellished quilt with glitz and glitter!


Wednesday, August 26, 2015

Friendship Ahead

Student work, 'Picture This!'
Summer flew by in a flurry of visitors and travel. We got the dining room/studio window replaced and repainted the room, finally! Although the design wall went up last weekend, my sewing machine is waiting for clear space on the table. I plan to kick start sewing again with a long Labor Day weekend retreat in Friendship, Maine. 4 days and 7 projects--maybe more!

I've also scheduled fall classes at Sew Portland. 'Picture This!' an all techniques class, spans two full Saturdays. Starting with a photo (or two) I describe how to turn photos into patterns and patterns into quilt tops. In class we'll be using a photo of mine taken in Friendship, but the techniques will translate to your own photos. My favorite part of this class is creating the tree!

The class was popular enough when I taught it last year in Trenton, that I created a pattern, 'Safe Harbor' which is available for sale at Sew Portland. No need to purchase my pattern for class though--I will provide what you need and teach you to make your own patterns. 'Picture This!' is scheduled for September 12 and 19.

I teach Free Motion Quilting on October 17. If you've been waiting for that one to come around, it isn't posted yet but they will take your name at the store or over the phone.

Taking a few months off of quilting wasn't easy, but I did take lots of photos to inspire new pieces this fall.

Saturday, May 30, 2015

One Done!

One more student quilt from the Voila class! Lisa completed her quilt with binding to match the brown and green polka-dot flower centers and first time free-motion quilting throughout the green background. Although she nearly changed her mind on the orange petals, they make a bright, sunny quilt. Way to go! She sent along this photo with her comment, which says it all--"love it, love it, love it!!!" 

Lisa's finished quilt

Thursday, May 21, 2015

Voila!

Voila!
I am teaching a two-day class at Sew Portland (part 2 is this Saturday.) We are working on raw-edge fusible applique. I designed an easy baby size quilt to learn on.

Last Saturday we spent time choosing fabrics--each student had her own unique vision. Fabric shopping is so much fun! We could have spent the whole day playing with fabrics but eventually we got to work cutting and stitching the backgrounds and learning to use fusible web. The product we used in class is Steam-a-Seam II Lite. My personal favorite is an oldie but goodie, Wonder Under. I love that stuff. But Steam-a-Seam has the advantage of acting like a Post-It note until you are ready to hit it with the iron, so the applique pieces go on the design wall, get moved around until you love it, then set with the iron, no pinning involved! A huge advantage in a classroom situation or for working on the large-sized petals in this pattern.

With tops done, students headed home to spray-baste the quilts in preparation for this week's completion session. If all goes according to plan, they will secure the fused applique with a variety of stitches, add some quilting in the background (free motion here we come!) and finally, apply the binding entirely by machine.

I couldn't resist showing off Victoria's completed top--she chose prints for her flower petals and added a border to make the quilt a little bigger. Flower Power!
Victoria's top


Friday, March 27, 2015

Lesson Two

More classwork to share. This lesson was about quick fabric sketches from artwork--the samples given were a Matisse and Lillian May Miller. Each sketch took a couple of hours to create, although with the Mt Fuji I went back and spent another evening adding thread work. Today though, I must prepare for teaching class tomorrow--Free Motion at Sew Portland, and it's full!
 

Sunday, February 8, 2015

Perseverance Pays Off


I just had to give a shout out to another student in the Stacked Coins class. Charlena has taken a few classes with Linda and me before, and is quite a good piecer. She has had some major frustration with free motion quilting in the past, though. Neither she nor I could get her machine to behave. Thread kept breaking, no matter what we tried in class. It would run fine on a sample piece, then we would move to the stacked coin quilt and stitch for a few seconds when Bam! the thread would break. Same thing last class she took. We tried changing needles, re-threading. No luck.

Well, she went home and here we are, a few weeks later--Voila! look at that lovely quilt, free motion quilted all over the background. Just in time for Valentine's Day, too, with her themed fabric choices. Charlena says she bought a new free motion foot and some Aurifil 100% cotton thread and it seemed to work. I say, whatever combination of things made the magic happen, yippee! Time to get out some of those other tops that have been waiting and get stitching.

Love it when perseverance finally wins out over frustration. Thanks for sharing the photo and your triumph, Chalena!

Thursday, January 29, 2015

Stacked Coins

Cindy's Stacked Coins baby quilt
Beginning quilter classes are such fun to teach! Linda and I just finished teaching a two-day class using the Stacked Coins pattern, which we modified from a Moda pattern that is available several places online. It is a great beginner pattern, as it starts with a charm pack and has no matching seams, thus reducing concern about accurately cut patches. We finally have the lesson plan tweaked so the quilts were very nearly complete at the end of class. Most students just had to finish quilting and add binding, and many had the binding cut and ready to go.

One of our students, Cindy, sent these photos of her completed baby quilt! Quilted with straight-line stitching and beautifully bound with the same fabric as her backing. Well done! We love seeing our students' work. Send more pictures!

Next up is a Free Motion Quilting class, on Saturday, February 21, 10:00 to 3:00. Lots of hands on practice there, learning to 'draw' with the sewing machine needle. I encourage students to bring in unfinished quilt tops so we can brainstorm various ways to quilt and complete them. Want to join the fun? Sign up at Sew Portland--in person at 306 Warren Ave in Portland, or by phone at 797-6700. 

Monday, September 15, 2014

Maine Fiber Arts at USM


Click here to see what made my day today!

If you are in the area, stop in to see Maine Fiber Arts' current exhibit at USM's Glickman Family Library, open every day, now through December 19. I am walking on air.

Friday, August 1, 2014

Honu Takes Off

Honu at Maine Quilts
Rana O'Connor 2014
Whirlwind month with lots of quilting activities and opportunities--Yea! Honu debuted at Maine Quilts and earned a ribbon. Judges comments included, "excellent choice of fabrics and placement to create stream of light." "Subtle seaweed design is well placed and well done." There were also some negatives, but we won't dwell on those! Honu is on his way to Manchester for World Quilt Show - New England XII where he will hang alongside quilts from Japan, the UK, Australia, South Africa and more. It is my favorite show, and of course we are going to spend a day lost in wonder.

Meanwhile, Art Quilts Maine had an exhibit at the Center for Maine Craft the month of July. Remember Chairs? They both sold, along with about two dozen Quiltini Pins! Guess I will be making more pins for future exhibits.

Speaking of which, I got a call from Maine Fiber Arts asking if 'Mom and Auntie Jean Play Gin' was available for an exhibit this fall at USM's Glickman Library. Mom will miss it, but she is happy to lend it. The dates are September 2 (my brother's birthday) to December 20 (my birthday.) Must be some symbolism in that! 

Classes are coming up, too. I'm teaching in Trenton August 22 and 23, at Sewing by the Sea. It's a technique class on turning photos into quilted wall hangings. Much like 'Honu' or 'Mom and Auntie Jean' in theory. The class is full and she is starting a wait list! That's exciting. Two classes are scheduled at Sew Portland this fall--the ever popular 'Beginning Free Motion Quilting', and a more advanced 'Thread Play' class. Participants will be given a piece of bold flower print fabric which they can cover with thread, both on the surface and as quilting. Kathy, who owns both stores, posted this video of me volunteering at her booth at Maine Quilts. I'm thread-painting the class sample, see?

A little R&R comes my way after the Trenton class with a long weekend's quilt retreat in Friendship. Ahh. Ocean, morning walks, afternoon kayaking, and all the quilting and sewing we care to do, with no interruptions. Can't wait.

Friday, June 27, 2014

Chairs, Chairs in July

While developing a workshop for an August class at Sewing by the Sea in Trenton, I made several versions of Adirondack chairs. These two proved to be too small to be manageable for students. So fussy! Such tiny pieces! I never throw things away though--even if I never use them again, bits and pieces from old projects are pinned to the design wall as visual reminders, like the trial wine glasses for 'Mom and Aunti Jean Play Gin'. (The ones on the quilt are the second pair, created after the experiments on how to make it look like the glasses had wine in them.) Coincidentally, I had two green squares from an exercise in perspective also pinned to the design wall. Put the two together and 'Voila!' Just loved them! A little thread paint and quilting later, mounted on stretched canvas, and the two are nearly ready to hang at the Center for Maine Craft exhibit that begins July 2, featuring several artists from Art Quilts Maine. Swing by the Center if you are out and about this July--it's in the West Gardiner travel plaza where 295 meets 95, so you pretty much have to go by it if you travel past Augusta. Starbucks, rest rooms and Maine crafts--what a concept!