Showing posts with label Color. Show all posts

Wednesday, April 26, 2017

Student Work

Lisa's Tree 2017
Lisa sent me a picture of her tree, begun in the "Tree Bits and Thread Paint" workshop recently! She added a bush to one side, and quilted the background with small circles, which was a great choice from my perspective, as my favorite part of her tree is the red fabric with colorful circles that appears in three or four locations.

Class trees ranged from the more realistic to fantasy, with curls and curves a la Dr Seuss. Placing tree bits took much of the day, but as the trees took shape class participants began to see the possibilities. It's fun and relaxing, playing with fabric in such a low-stress way. Watch for the class to be scheduled again later this year!

Saturday, April 15, 2017

Road Trip!

Dana Thank You
Great road trip with a friend last week. Dana proposed driving to Amherst, Mass to see a quilt show. Obviously the right words to get me out of the studio! While Dana is not a quilter, the show featured two artists she knew well, a mother and daughter, both named Valerie. Valerie (the elder, at 92!) quilts while her daughter is a watercolor artist. Their show was hung in a space with lots of natural light and great seating. We spent hours talking about fabric, art and design techniques. The work was colorful and varied, with some lovely fabric landscapes. Valerie's story mirrors mine in another way--she grew up in Iran! Born in Russia, she emigrated to Tabriz then attended high school in Tehran, where she met and married an American serviceman, moving to the US in 1947! I moved to Iran in 1960, returning to the US in 1973. Small world. I wanted to make Dana a thank you card for suggesting the day's adventure and handling all the details. Knowing she spends lots of time at the beach, I pulled fabrics to create a beach scene, cut wavy lines for the ocean and sand dunes and layered them on batting. The sky was a real find--a piece of light blue with white flowers that were just abstract enough to suggest clouds and sun. A handful of shells and beads added a bit of focus. Hope she likes it! Below, two pieces from the show--love the similar color palette!

Wednesday, April 20, 2016

A Mess of Thread

This is a pretty wonky post so if you aren't into the minutiae of quilting, you may want to just scroll through the pictures.

I thought it would be fun to describe how I came to quilt (and quilt) my latest quilt. Don't you find it confusing that quilt is both a noun and a verb? I started with a very simple pattern in one of my older books. The pattern is a traditional Boston Common with some four-patch blocks in alternate rows. I chose it because I had a stack of mostly sunflower fabrics to use and the required amounts meshed well with what I had. It's also a pattern I love, so I knew I would enjoy piecing it.

I chain pieced the blocks, finishing the top over a couple of weekends. Then came quilting decisions. One reason I put this simple top together was to practice quilting with my new toy, a free motion quilting foot set. It is pretty cool. Three different feet on a base that attaches to my machine. Open toe, closed toe and for lack of a better term, big toe.

I started off stitching in the ditch along several major seam lines to provide stability. I'm not convinced when everything has been spray basted that this is a necessary step, but it gave me a chance to move the quilt around under my machine, assessing what might work for free motion patterns. I knew I wanted some curvy quilting to offset the straight lines of the design, and I wanted some of that quilting to be feathers.

Quilted
Starting in the light center portion, I quilted feathers out from the center to the yellow corners. I liked the effect but had chosen a variegated yellow thread and it just didn't show up as much as I wanted it to. I let that thought percolate for a while as I quilted a leaf and vine pattern in the green squares, treating them as a border. Originally I had selected a green thread for this, but opted to keep my machine threaded with yellow, increasing visibility on the green background. Better, though still not a strong enough statement. A friend suggested I go around a second time, outlining the leaf and vine pattern. That second row of yellow quilting really helped.

For the outside border I chose piano keys for their straight lines, balancing the curved quilting everywhere else. The green thread worked well here. I used blue painter's tape along the block points to mark the keys and guide my stitching, which I carried into the green border, stopping each line where it touched the leaves. For these straight lines I switched back to a regular foot, not free motion. This provided greater control but also meant I had to stop and start over for each line. I think long-arm quilters use a ruler for this work. I hear a ruler foot is available for a domestic machine now--maybe that will be my next toy?

Red Thread!
Next came filler quilting. To make motifs pop you need to flatten the background. To accomplish this I first echo quilted my feathers twice using yellow thread, then switched to Bottom Line thread in off-white so it would not compete with my feathers and stippled the open areas. I loved how the feathers began to fill and stand away from the background but that yellow thread still blended into the background to the point of disappearing! In desperation I grabbed a spool of heavy, dark red thread and quilted over one of the feathers, figuring I could rip it out if I wasn't pleased. Not bad! I took a deep breath and over-quilted all the feathers with dark red, leaving the yellow beneath and as echo quilting. Much happier. Who would have thought?

Vines, feather, piano keys and fill
Remember the green thread? I decided to use it as filler thread around the vine, as the color blended with the background better than my Bottom Line off-white. Being thicker than Bottom Line, the green also provided a nice texture change. I filled all the spaces between the leaves on the side of the quilt next to the center, but on the side with the piano keys I opted to add filler only to a few larger spaces, between the keys. I love the effect!

All that's left is to bind and label. I'm seriously thinking of naming it A Mess of Thread--all that quilting and over quilting and issues with tension as I learned to work with my new feet! For the record, I really like them. Much better than my old clear plastic foot that wasn't so clear any more and was hard to see through and hard to see around. The metal feet are so much smaller they don't obscure my vision at all. If you've stuck with me this long, you are truly a quilting geek! Go quilt!

The back

Thursday, February 11, 2016

Baker's Dozen

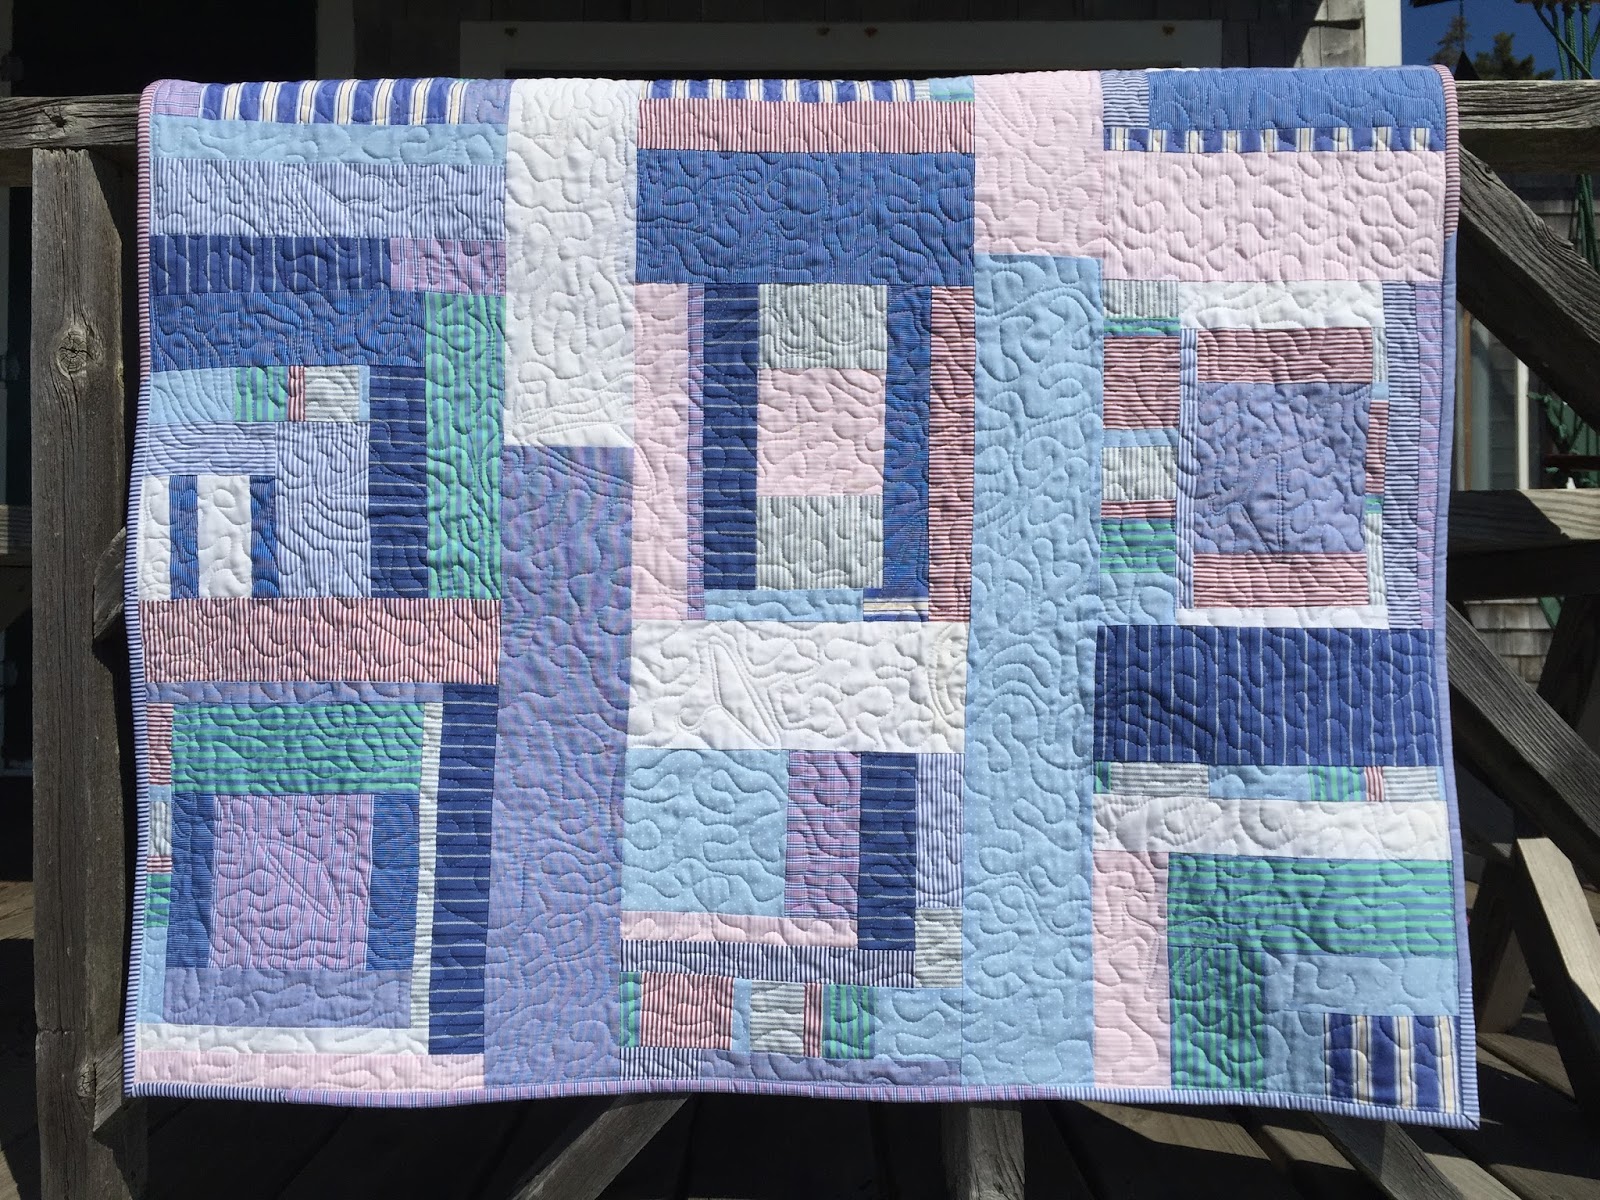
Just finished quilting a small quilt top I made last summer. Time can get away from me! In a departure from my usually more scripted work, this top was pieced improvisationally from strips and squares. I don't have solids in my stash, but I had a bag of solid scraps (and added one fabric to make 13 colors, but used the back side to hide the print!) With a few parameters in place, the blocks came together quickly and went up on the design wall. Pieced sashing helped blur the block edges and brought the composition together.

I enjoyed the improv piecing so much I started on another one right away! I made the second one from shirting fabrics and quilted it in Friendship last summer, in an all-over clothes hanger pattern. A friend snapped it up, but here's a photo.

Recently I pulled out the solid pieced top and decided it was time to quilt it. In keeping with the improvisational spirit, I  chose to let the quilting develop organically as well. The first decision I made was to overlay the quilting, rather than follow any of the lines in the quilt, but I wanted something more than an all-over pattern. I grabbed a dinner plate and a salad plate and a piece of chalk and drew large, concentric circles. Stitched those. Filled the space between the circles with smaller circles and curlicues. Added straight lines, like ladders. Decision by decision, the quilting filled the top.

Now that it's done, I want to share the fun of making these quick, no stress pieces. My friend Linda and I will be teaching a beginner friendly class, Baker's Dozen Improvisational Piecing on May 14 at the new class space at The Sewing Machine Exchange in Falmouth, Come if you can!

Wednesday, August 26, 2015

Friendship Ahead

Student work, 'Picture This!'
Summer flew by in a flurry of visitors and travel. We got the dining room/studio window replaced and repainted the room, finally! Although the design wall went up last weekend, my sewing machine is waiting for clear space on the table. I plan to kick start sewing again with a long Labor Day weekend retreat in Friendship, Maine. 4 days and 7 projects--maybe more!

I've also scheduled fall classes at Sew Portland. 'Picture This!' an all techniques class, spans two full Saturdays. Starting with a photo (or two) I describe how to turn photos into patterns and patterns into quilt tops. In class we'll be using a photo of mine taken in Friendship, but the techniques will translate to your own photos. My favorite part of this class is creating the tree!

The class was popular enough when I taught it last year in Trenton, that I created a pattern, 'Safe Harbor' which is available for sale at Sew Portland. No need to purchase my pattern for class though--I will provide what you need and teach you to make your own patterns. 'Picture This!' is scheduled for September 12 and 19.

I teach Free Motion Quilting on October 17. If you've been waiting for that one to come around, it isn't posted yet but they will take your name at the store or over the phone.

Taking a few months off of quilting wasn't easy, but I did take lots of photos to inspire new pieces this fall.

Sunday, February 8, 2015

Perseverance Pays Off


I just had to give a shout out to another student in the Stacked Coins class. Charlena has taken a few classes with Linda and me before, and is quite a good piecer. She has had some major frustration with free motion quilting in the past, though. Neither she nor I could get her machine to behave. Thread kept breaking, no matter what we tried in class. It would run fine on a sample piece, then we would move to the stacked coin quilt and stitch for a few seconds when Bam! the thread would break. Same thing last class she took. We tried changing needles, re-threading. No luck.

Well, she went home and here we are, a few weeks later--Voila! look at that lovely quilt, free motion quilted all over the background. Just in time for Valentine's Day, too, with her themed fabric choices. Charlena says she bought a new free motion foot and some Aurifil 100% cotton thread and it seemed to work. I say, whatever combination of things made the magic happen, yippee! Time to get out some of those other tops that have been waiting and get stitching.

Love it when perseverance finally wins out over frustration. Thanks for sharing the photo and your triumph, Chalena!

Thursday, July 17, 2014

A Revelation

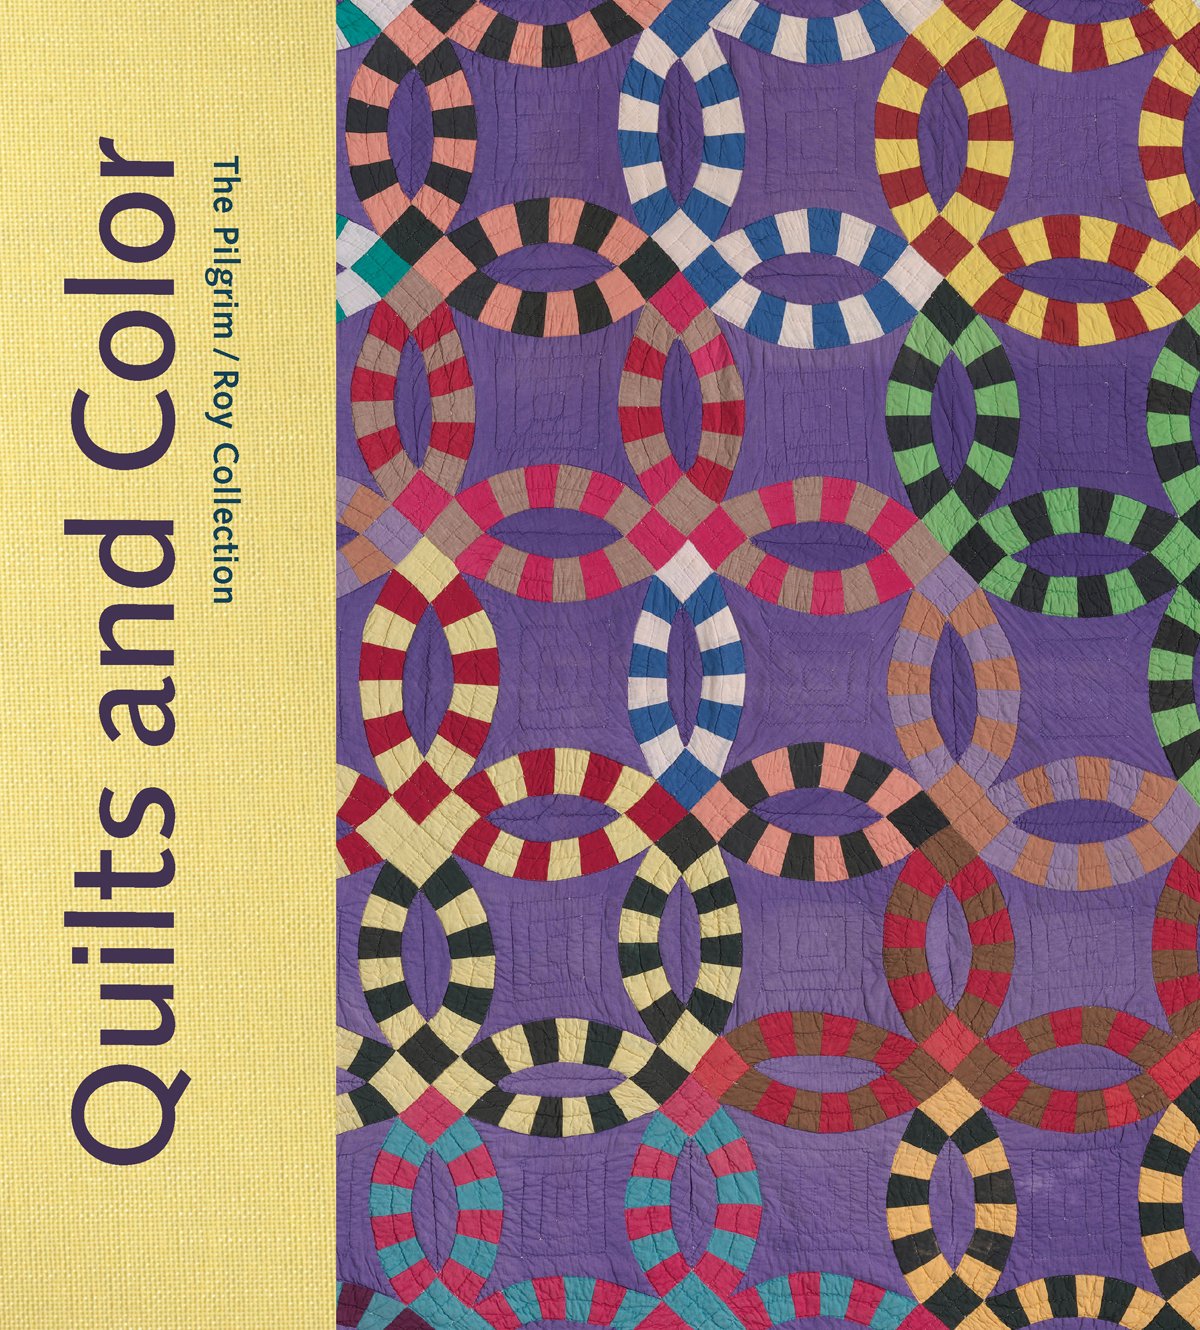
That's what the first room of the Pilgrim/Roy exhibit at Boston's Museum of Fine Arts was to me. The room was dimly lit, as though by lantern or candlelight. The quilts in that room were shot through with cheddar orange--garishly bright orange solid fabric in backgrounds or piecing.  Except in that light, the way the quilts likely looked on the beds they were made for in the late 1800's, in that light they glowed, as though lit with an inner fire. It was magical and revealed why women of the era would have loved that color--who wouldn't?

The rest of the show? Quilt upon quilt of excellent workmanship, representative of so many styles we know and love. Log cabins--some of silk and velvet, Mennonite and Amish quilts of graphic simplicity, an intricate Baltimore Album. Another historical tidbit--the Baltimore Album was made by many women, each contributing a square. Ah hah.

Displayed alongside the quilts were examples of modern art reflecting quilting sensibilities. Vivid color combinations, abstraction and op art, or my favorite, a piece by Sister Mary Corita Kent, 'N is for Caution (Throw Caution to the Wind)' hung beside a double wedding ring with purple background and quilts without pattern, created with abandon. Quilts and Color.. If you can't get to the show, buy the book!

Sunday, February 2, 2014

Signed, Sealed and Delivered

Finished the commission piece and met up with the new owner for lunch to hand over the quilt. She was happy with the finished product which is what matters most when you are making a quilt for someone else. It is an interesting collaboration--taking their ideas and impressions and interpreting them through your own filter. Her vision was of a quilt that implied a person walking their dog on the beach but not a wall hanging or pictorial quilt, more something you could wrap up in. I love this photo of the beach-y quilt with snow in the background.

Wednesday, August 21, 2013

Win a Free Online Class!


An opportunity came my way from Eric Woolf, online media coordinator from Fons and Porter to review an online class at:
Daily Craft TV
 Click the link to check out their many classes for yourself! This site has lots of great classes, with new ones being added all the time. They are not liminted to quilting, either--classes on Knitting, Crochet, and Papercraft, or Sewing and Scrapbooking are also available at a click of the mouse.

I had my pick of the classes, so I chose
4325_Unique-Quilting-Ideas
with several well known instructors. The class was an hour long, formatted much like a TV show, with several 10-minute segments. The focus was on enhancing quilts (primarily art quilts) by the use of image transfers, colored pencil applique, understanding color temperature and more. I really enjoyed the technique segments--Heather Thomas' image transfer techniques really got me thinking about adding photography to quilts again. I had not loved using the prepared fabric and she shows several ways to use your own fabric for fabulous results. I also love that you can move through this class at your own pace, stopping, rewinding, or returning to the information at a later date.

Because this was a series of short segments, I was aware that not all the segments would appeal to me--such as joining binding edges--but I could skip over that easily enough. Also, being short segments, I found myself wanting more--more information, maybe taking a project from start to finish. But, there are classes on the site with a single instructor and those would cover a topic in depth. Maybe Heather Thomas will do a full hour on image transfers soon!

While these classes are quite affordable--ranging from under $4.99 to $9.99--the quality is excellent, with plenty of close ups to be sure you can see what the instructor is working on.

And here's the best news--one lucky reader will win a Free Class at
 Daily Craft TV  

Just leave a comment on this blog saying "I want to win!" and I will contact the winner with instructions on how to access their free class.


More quilt photos! Click here

Friday, June 7, 2013

Yes! Water!

After months of placing, pasting and rearranging, I tried a different technique for the water on my turtle quilt, Honu, and I am really liking it so far. Labor intensive but so worth the liquid feeling. Here's hoping the same technique will carry through to create rays of sunshine and the coral reef. Although I worked all afternoon--I even had help cutting fabric--I got just a narrow strip completed. I tried to get a photo, but it doesn't come through on camera yet, looks disjointed. You will just have to wait a bit. If the stars align I will get more done this weekend, and be able to get a photo that reflects what I am seeing develop. It's so exciting to be moving forward though that I wanted to give you a heads up! I generally don't advertise a particular product, but I  would not be getting through this project without 505 temporary spray adhesive. I love how I can spray the foundation, put pieces in place, move, rearrange, spray again, add more layers and when I am done, find the piece is not too sticky to manage. I worked on the dining table today, then held my breath and picked up the whole piece to transfer back to the design wall. It worked! When I have the background completely laid out, I will give it a final spray and cover with tulle. I found the glue dries quickly and cleanly so I'll be able to thread paint or quilt right over it. I have tried other glue products before and have found them either too messy or they dry and pieces can't be rearranged. On Dreams I literally tore the girl's hair out in order to rearrange a section! Swore then that I would find another technique. The only drawback I see is spraying a chemical into the studio. While 505 temporary adhesive has no offensive odor and claims to be non-toxic, I still might put a gas mask on my Christmas list

Quilt gallery and quilts for sale at: Quilt Photos

Thursday, May 23, 2013

It's Not Water Yet!

I am at an impasse with my honu quilt. The turtle is great. I covered it with tulle so it can be lifted up as a separate element and put to the side, which is also good. The background, though. The water. It has stymied me for months! I've bought lots of blues/greens. Pulled out every blue in my stash and scraps. Cut strips, irregular shapes, small bits. Ever get to a place where you can't seem to make progress? My next thought is to pull the piece off the design wall and try working on it, section by section, on a table. At least that would alleviate the fatigue of having my arms up all the time, placing and rearranging fabrics. And I want to try using very small bits of fabric--it feels too jumpy with the wide strips and large shapes. I know I will resolve this--I always figure a way out of my self-made dilemmas. On the bright side, Linda M and I will be teaching a new class, starting May 31 at Sew Portland! It's our class on color and design--I totally love the variety of designs that flow from a stack of half square triangles.


Quilt gallery and quilts for sale at: Rana's Quilts

Tuesday, May 7, 2013

Published!

Here's a fun piece I made for a friend who loves fairies. It was published in Quilter's Digest, a newsletter you can find, free, at your local quilt store! I'll be teaching another class with Linda Morrisette at Sew Portland May 31, June 7 and June 14. The class, "In Living Color" demonstrates a fun way to choose colors for your quilt projects, then design a small wall hanging using half-square triangles. Very easy piecing, beginner friendly. Find something with colors you love and bring it to the first class. It could be an art object, a photograph, maybe a page from a magazine. As long as you  love the colors it will work. Will schedule an optional free motion quilting class for those who want assistance finishing the wall hanging. Click here to register!


Quilt gallery and quilts for sale at:Photos

Sunday, March 17, 2013

Honu in process


Honu in process
Worked on Honu today, adding much of the shell. Not sure it is done yet--but getting close. Loved the technique of spraying temporary glue on the background and layering on the fabrics--the only glue option I have felt OK using so far. Once I am settled with the shell, I plan to move on to free-form ocean for the background, in shades of aqua, blue and bits of bright colors. I am wondering if I should layer tulle over the turtle before jumping into the background as a way to protect all the little bits while I work around it. I think I need to head to a fabric store with some of the fabrics in hand to audition various tulles sooner rather than later, as once the tulle is in place, I am committed to the fabric choices beneath it. Does honu look ready to swim?
Quilt gallery and quilts for sale at: Rana's quilt photos.
Honu with re-worked shell

Wednesday, March 13, 2013

Stacked Coins and Class Announcement

Liz' Kidz
I start with have high hopes that all the students in my classes will leave with a totally finished product. I am finally realizing that it isn't about taking that last stitch--it's about what you learn along the way. The Stacked Coins class learned color and fabric selection, cutting techniques, tips to improve design and layout, setting up their machines to sew scant 1/4" seams, string piecing, spray basting, straight and free motion quilting, a little quilt-as-you-go, binding and labels. Most are also done or very nearly done with their quilts, so, mission accomplished! Whew!

Monkeys! by Stephannie
Ready for more? Linda and I will be teaching "In Living Color" as our next adventure. Linda is only able to join us for the first session, Friday, March 29 at 3:00. This will be a test to see how I manage without my trusty co-pilot. The class continues on April 5 and 12, with a goal of completing Just the Top! This class starts with an image or object you bring whose colors inspire you, and translates that inspiration into the the colors of your quilt. Trust me!

Grandmother's China by Rana

Quilt gallery and quilts for sale at: Photo Album

Monday, December 10, 2012

Book Review Monday

 
The family that reads together...
photo by Rana O'Connor
Eric Woolf at Fons and Porter emailed today to ask if I would write a review of their Log Cabin Quilt e-book. Shortly, the book was in my inbox ready for download. My first impression was wow, beautiful pictures and great colors! The cover showcases three patterns. One is sure to grab your eye. Titled Build Your Best Log Cabin, the book features antique log cabin quilts from Sara Miller’s collection alongside modern quilt patterns for each of three log cabin block variations: Traditional, Courthouse Steps, and Chevron. There’s loads of technical information as well—cutting charts for each block style to take the guesswork out of designing your own quilt, side bars with tips and tricks, and instructions for special binding finishes. I would have liked a side bar on Sara Miller who collected the antique eye candy quilts pictured. Download the book just to see the antiques, even if you have no plans to make your own log cabin quilt—you might be inspired! Here’s the link: Build your Best Log Cabin

Thursday, September 27, 2012

Round Robin


Have you ever done a round robin exchange? I have not, so this year I was challenged to join our guild's Round Robin Border Exchange. I made a center block--see photos--and will hand it off to another quilter to add a border. That quilter passes it on to someone else until there are 3 borders added, then it will come back to me. Meanwhile, I will work on 3 other quilts, adding a border to each. Confusing? You should see the schematic for passing quilts! But I am assured it all works and it is fun and challenging. I am concerned that my block may be too detailed--I've seen appliqued center blocks before but not like mine, and that it might be too thick. In order to secure all the tiny scraps on this block, I thread painted the whole thing to the muslin backing. On a positive note, it has been fun so far--I had a great time making this block, and it gave me a chance to try out Susan Carlson's collage technique. Plus I really like how it came out, so it will be fun to see it in May when it has border 1, border 2, and border 3 added on! Can't wait to see the block I will be adding a first border to--I'll be getting it Monday!

Quilt gallery and quilts for sale at: http://community.webshots.com/user/roconnorquilts

Thursday, March 8, 2012

Random Mention

I opened my e-newsletter from Maine Fiberarts today and got a nice surprise! A detail photo from my quilt, "Being Alive is the Magic" was featured in the header. I know the photos are random, but it was still great fun to see it! If you have not had the opportunity to check out Maine Fiberarts, you must take a minute to do so:
http://www.mainefiberarts.org/

Should you find yourself in Topsham, be sure to stop by their building at 13 Main Street. They always have a fiber art exhibit on display, and you can pick up a copy of the Maine Fiberarts Tour Map while you are there.

Quilt gallery and quilts for sale at: http://community.webshots.com/user/roconnorquilts

Thursday, August 18, 2011

VOTE Online for Bali Bloom

I entered an online quilt contest! The theme this week is quilts with flowers. Of course I thought of Bali Bloom, with that one big pink hibiscus flower and sparkly beads. Take a minute between Friday morning and midnite Sunday to head over to the Quilting Gallery and vote for your favorite flower quilt. It is all in fun.

On another front, the Art Quilts Maine travelling quilt show, Inspiration Transformation opened at Devanny Doak and Garrett Booksellers this week with some great publicity. There were stories in the Sun Journal and the Daily Bulldog, and an article is in the works for Publishers Weekly Children's Bookshelf, an online newsletter about the children's book business. You may recall the 16 quilts in this travelling show were inspired by favorite children's books. It is awesome to be a part of this talented group of artists.   

Quilt gallery and quilts for sale at: http://community.webshots.com/user/roconnorquilts

Monday, September 28, 2009

Quick update

Sarah Ann Smith's book is very nearly on the shelves! It is called 'Threadwork Unraveled'. I still don't know if "Postcard from Rajasthan" made it in or not, but either way, very cool. Meanwhile, a very quick update and a quick peak. We started a new group quilt at work--lots of fun techiques incorporated from things we have learned. It has to do with trees and I promise a photo when we get it done, but that's it for now! Meanwhile on the home front: McAuley Angel continues to collect embellishments--silk vines and the promise of beads to approximate the mounds of hydrangea surrounding her at this season, and the baby quilt, "Where the Deep Ones Are" a la 'Where the Wild Things Are' is beginning to take shape. Lots of stitching, not much writing!

Quilt gallery and quilts for sale at: http://community.webshots.com/user/roconnorquilts

Sunday, August 9, 2009

Bali Done

Bali Bloom is finished! Or at least I think it is. I have it ready to take to the office tomorrow and see how it looks on display--and whether others concur that it is complete. Beaded several weeks while hanging out with my father-in-law watching the Red Sox on TV. What do you think? Is it done yet? Click on the photo to see a larger picture. The beading actually looks subtle in this shot!


Several of us met up for a quick trip to the Lowell Quilt Festival. We spent Thursday at a wonderfully fun workshop with Barbara Olson.We worked on flowers using very wild, vivid colors and patterns and learned design principals and an applique technique involving glue (which I am not at all fond of. In fact, in order to finish my piece I think I will need to figure out a different technique!)
But we had such a great time together and saw oh so many beautiful, take your breath away quilts.

Quilt gallery and quilts for sale at: http://community.webshots.com/user/roconnorquilts