 |
| Liz' Kidz |
 |
| Monkeys! by Stephannie |
 |
| Grandmother's China by Rana |
|
| Liz' Kidz |
|
| Monkeys! by Stephannie |
|
| Grandmother's China by Rana |

 The sea turtle is finally taking another step forward. Here are two flippers--just the background, on the left, and with scales added, on the right. The scales are held in place temporarily with spray glue, and will be covered with a layer of gold tulle--you can see the pins through the tulle. Eventually I will stitch through the tulle, around each scale, to hold it in place and delineate the scales even more. I think the colors are going to work great!
 Here are the other two completed projects. The fairy is a present for a friend who has gifted me with fairy-themed calendars every year. Still looking for a day when I can meet up and give it to her! Sequins add a touch of sparkle to the background. The other piece, Circular Convergence, is from a pattern handed out at our guild, along with one of the 4 fabrics needed to complete the pattern. The style of quilt is called convergence quilts, created by Ricky Tims. I had thought to go all neutrals when I got the brown fabric, but somehow I ended up with the red and yellow--they just seemed to invite themselves. I quite liked quilting the big, interlocking circles and pretty feathers on the border. I would say this is my most successful feather quilting to date. No new projects on the design wall--must change that!
 Been finishing up a number of projects this month. Once I got the sample and tutorial for class done, I wanted to make up one more sample for a magazine submission. Then there was this idea for a 'very late' present for a friend, and finally one of the two guild challenges I signed on to do this year. That almost clears the decks! Still waiting is the second challenge (due in June) and a piece that I started soon after returning from Hawaii. I'd love to have that one done for June as well, but it will take whatever time it takes. I have a few pictures to post. I'll start with 'Dark Wood', a sample I created for my article submission. Don't know if the article is accepted yet, but I have the samples done! Here is a full shot and close up. Very fun technique that I hope to teach/demo/write about. Love the glittery tulle shadow!
 Quilt gallery and quilts for sale at: Quilt Photos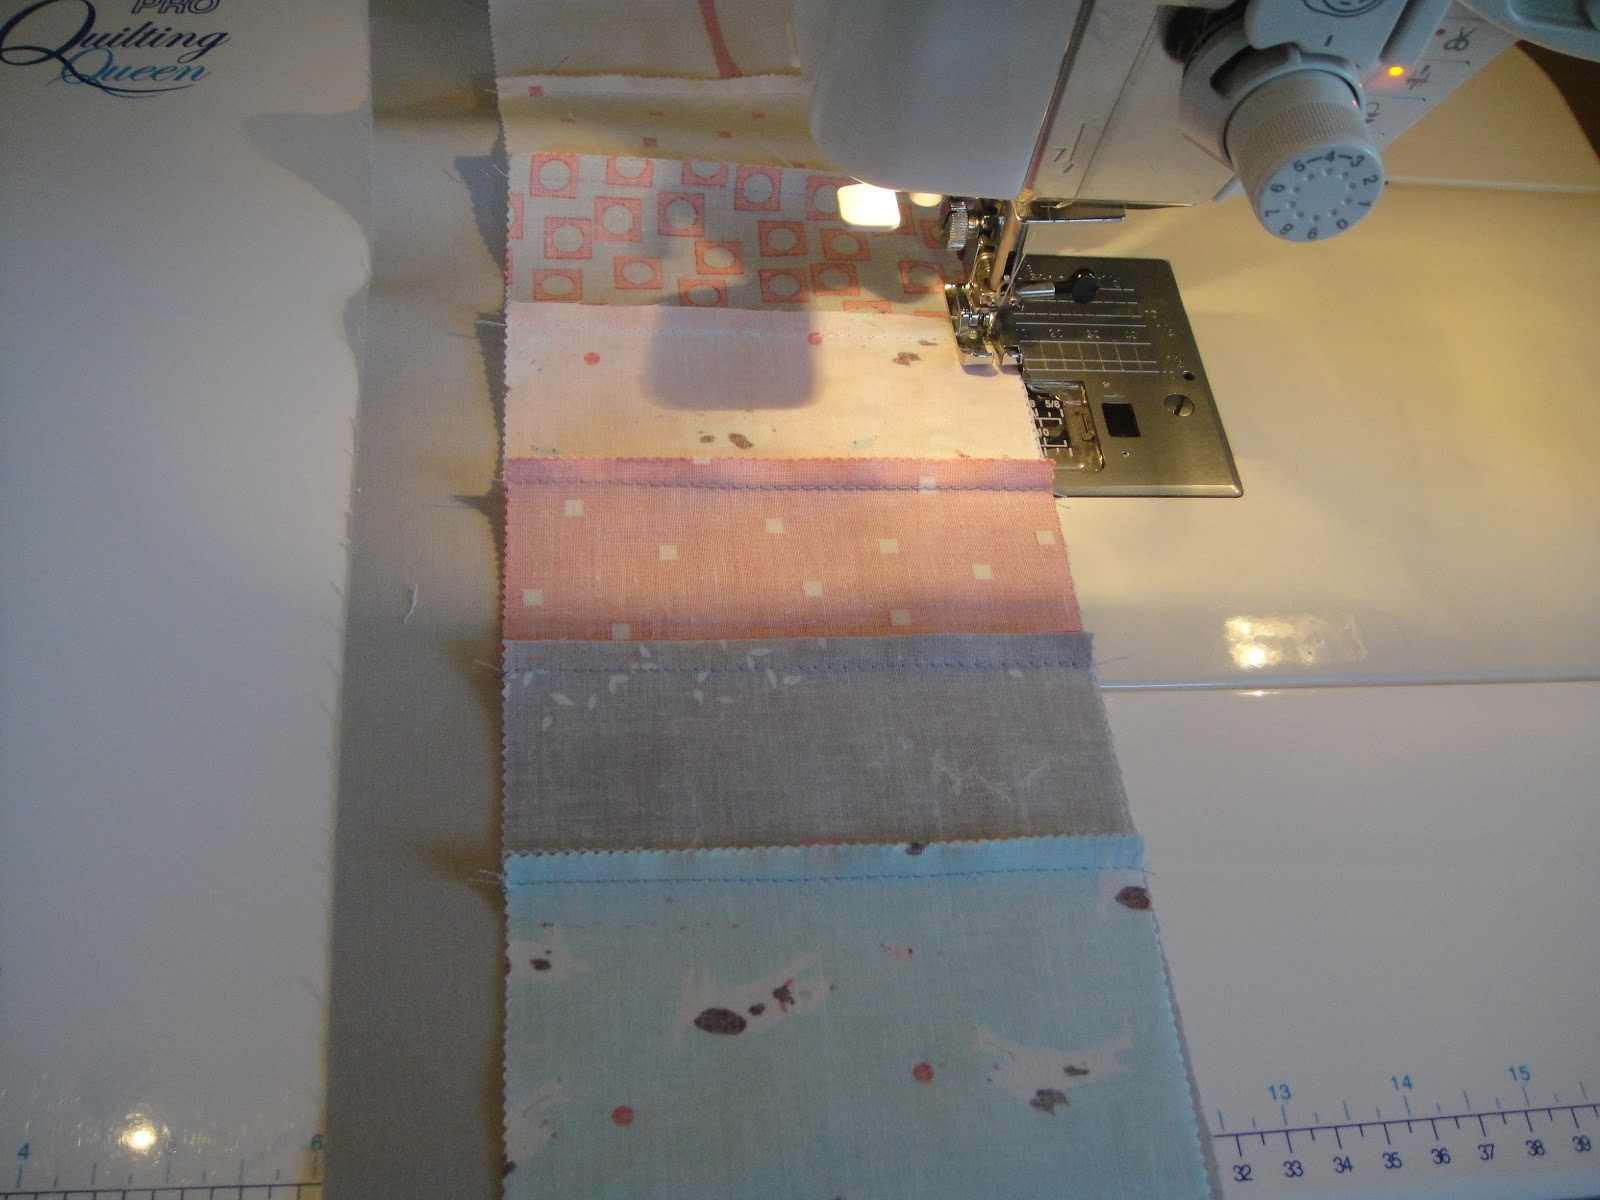

 Once the quilting is done, it’s time to bind the quilt. Cut your binding fabric into strips 2 ¼” wide
by width of fabric. Piece the strips together, to make
one continuous length at least 15” longer than the quilt’s perimeter.
This quilt needs about 170” of binding. Fold in half lengthwise with wrong
sides together, pressing as you go, to make a strip that is 1 ⅛” wide. Stitch
to quilt, matching raw edges and mitering corners. Finish tails with a diagonal seam.
Trim backing and batting ½” away from the seam. This will give you
the ¼” seam plus about ¼” of backing/batting to fill the binding. Press binding
away from quilt. Turn folded edge to quilt back and stitch by hand. Try not to
let stitches show on the front.
Once the quilting is done, it’s time to bind the quilt. Cut your binding fabric into strips 2 ¼” wide
by width of fabric. Piece the strips together, to make
one continuous length at least 15” longer than the quilt’s perimeter.
This quilt needs about 170” of binding. Fold in half lengthwise with wrong
sides together, pressing as you go, to make a strip that is 1 ⅛” wide. Stitch
to quilt, matching raw edges and mitering corners. Finish tails with a diagonal seam.
Trim backing and batting ½” away from the seam. This will give you
the ¼” seam plus about ¼” of backing/batting to fill the binding. Press binding
away from quilt. Turn folded edge to quilt back and stitch by hand. Try not to
let stitches show on the front. 

 I am teaching a 6-week series for new quilters at Sew Portland starting January 25. I thought it would be fun to post a tutorial here for the stacked coins quilt we'll be working on in class. Work along with us if you like!
Here are the fabric requirements:
I am teaching a 6-week series for new quilters at Sew Portland starting January 25. I thought it would be fun to post a tutorial here for the stacked coins quilt we'll be working on in class. Work along with us if you like!
Here are the fabric requirements: Cut charms in half. I chose to leave a few uncut, like the girl on a swing--so look through your charms before you cut! If any of your charms have directional prints, be mindful when you cut them—note the dogs on the red charm.
 Make two stacks of cut charms (coins) and start chain piecing pairs. Try not to get too fussy about which coins to pair up. Leaving 8 to 10 coins unpaired will give you design flexibility.
Press paired coins open, pressing seams to one side. Lay out 3 columns with 20 coins in each column. Don’t forget to include any uncut charms in your columns—count each of those as 2 coins. Use your single coins as needed to create three columns that make you happy. Stitch columns, press. They should each be roughly 42” long.
Make two stacks of cut charms (coins) and start chain piecing pairs. Try not to get too fussy about which coins to pair up. Leaving 8 to 10 coins unpaired will give you design flexibility.
Press paired coins open, pressing seams to one side. Lay out 3 columns with 20 coins in each column. Don’t forget to include any uncut charms in your columns—count each of those as 2 coins. Use your single coins as needed to create three columns that make you happy. Stitch columns, press. They should each be roughly 42” long. Check back for part two. This is a super simple quilt and lots of fun to make with different fabric and quilting choices. Any questions?
